

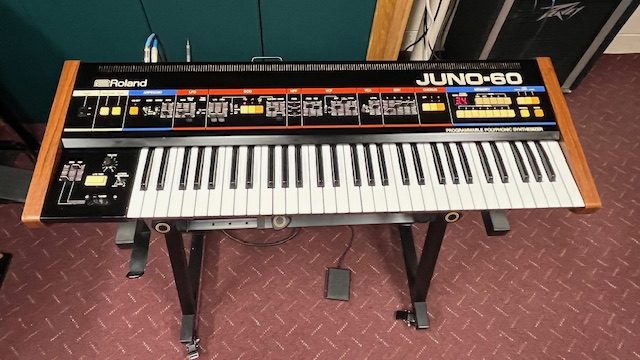
I’m very pleased to own a beautiful, fully-functional, great-sounding Roland Jun0-60. It’s a highly regarded, 6-voice analog polyphonic synthesizer introduced in 1982, with a digitally-controlled analog oscillator. What a concept it was for the time! It actually stays in tune!
In May 1982, Roland introduced the Juno-6, a moderately priced polyphonic synth meant to appeal to musicians who could not afford Roland’s top-drawer Jupiter-8, Sequential Circuit’s Prophet-5, or some of the other premium synthesizers of the era. At its 1981 introduction, the Jupiter-8 listed for $5,295. The Juno-6 hit the market for $1,295. In September 1982, Roland launched the Juno-60, which was mostly a clone of the Juno-6, with the addition of the ability to save patches to memory, and it was equipped with a Digital Control Bus (DCB) connector. DCB was a data interchange interface Roland had developed. One year later, with the introduction of the Roland JX-3P polyphonic synth, Roland began offering the superior MIDI standard.
That the Juno-60 was designed to be a budget synthesizer was clear from the fact that it only has a single oscillator. But it was brilliantly conceived, and has been loved for decades. It has a wonderful fat sound, thanks in part to three features: A gorgeous chorus effect, its sub-oscillator, and pulse width modulation.
When I bought my Roland JX-3P, in many ways, it was an economic decision. I love my JX-3P and its PG-200 programmer, but I would have preferred to buy a Juno-60. The problem was that Juno prices were sky-high during the pandemic. I bought the JX-3P for roughly 20 percent of the asking prices for Juno-60s. But a few years later, the pricing bubble burst. Juno-60 sale prices began falling to more reasonable levels.
In the summer of 2024, I considered buying a Juno-6 for sale near me. I decided I could get along without patch memory if the price was much lower than for a 60. But then I discovered that this particular Juno-6 was a 100-volt version built for the Japanese market. The owner assured me that it worked fine on the higher US voltage, even though he was using it without a step-down transformer to lower the voltage to the 100 volts the synth was manufactured to operate on. But while operating a 100-volt synth at higher US voltages may work fine for a while, it was likely that his synth was filled with overheated, if not charred, components that could fail at any time. I walked away from that deal. A few months later, I found a Juno-60 for sale near me at a good price. It was mostly functional, but it had an electronic issue that I feared might require replacing an integrated circuit that is no longer available. It was also in poor cosmetic condition, and I was determined that I would not put a lot of time and money into an electronic restoration of a beat-up instrument.
A few weeks later, I found what looked like a pretty nice one at a reasonable price. The issue was that seeing it would have been a 6-hour round-trip drive. And then the owner suddenly stopped responding to my messages. I figured this wasn’t going to work out. But a couple of weeks later, I went on a vacation that took me within an hour of the seller’s location. I contacted him, and we agreed to meet. It was in good condition, but it was going to need more than a little work, both electronically and cosmetically. But the price was right, so I decided to take a chance that the synth could be made fully functional. It was a gamble because some of its components are no longer being produced, and can only be replaced with used parts from someone else’s presumably broken, 40+ year old synth. I had never worked on a Juno-60 before, so I was anticipating I would need to hire a tech to help sort it out. But I started tackling a few issues on my own. And, in the end, I ended up handling all the work myself — and the results have been excellent. It is now fully functional and looks great, too.
One of the biggest problems with the synth I bought was that none of the factory patches worked. So, unless that could be fixed, it was more or less a Juno-6. The seller had owned it for 18 years, and said the patches never worked during that time. Typically, the issue with the patch memory is simply that the soldered-in battery dies, and all the patches are lost. But I was concerned that if two owners had played it for so long without its patches, it might be that something much more serious was wrong with it.
But I got lucky. With a good battery in place, everything seemed to be in order. I would just have to restore the original factory patches. This is done by loading an audio file – which sounds like the tones of an old computer modem – into the synth. I searched the web until I found a sound file of the original factory patches. I downloaded it to my phone, and then connected my phone to the Load input of the Juno-60 with a cable. The volume at which the audio file is loaded is critical, and it often takes multiple tries for it to load correctly. I started by setting my phone volume to about 2/3 of its maximum, and was prepared to adjust the volume repeatedly to make it work. But it loaded the first time. So far, so good.
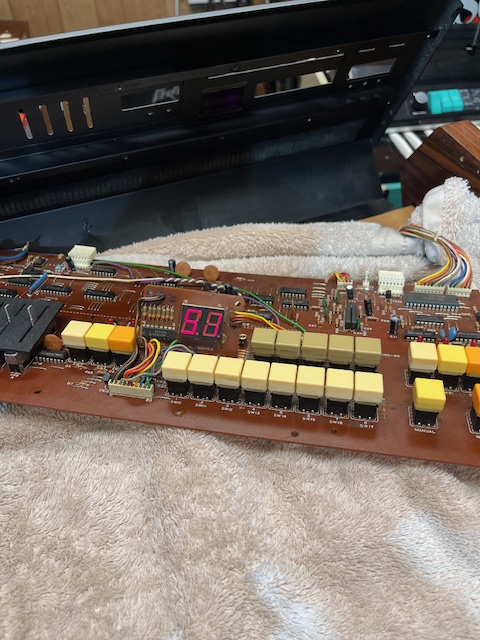
Then I discovered that a number of the momentary switches on the synth weren’t working, including some that allow you to select patch numbers. Without these, certain patches could not be accessed. I was able to save a couple of them by disassembling them and carefully cleaning them with isopropyl alcohol. But that didn’t work on all of them. The issue was that inside each switch, there is a little silicone actuator with electrically conductive bits inside it. When the button on top of the switch is pressed, the actuator is compressed, and the conductive area of the actuator completes the circuit by being pressed against another contact. This is hardly the most durable design. Sometimes the silicone actuators rip after years of use. Also, if they get exposed to contact cleaner, they can swell-up to an extent that they no longer fit properly in the switch body, and I know of no way to shrink them back to their original size.
I had four of these actuators that needed replacement. There is a company that makes a modern replacement switch that works, but the replacement switch clicks as it is actuated, unlike the original switches. https://rosensound.com/products/juno-60-momentary-button-replacement. So, it is best used in a situation in which all the switches on a Juno-60 need replacement.
I got lucky again, and found someone on Reverb.com who was selling some original switches that had been tested. I happily bought a bunch from him. Then I very carefully disassembled the “new” switches, and used tweezers to remove their good actuators and reinstall them into the non-working switches of my Juno-60. It was a delicate bit of “surgery” – but it worked perfectly.
There is also an LFO switch on the bender panel that allows the player to apply the LFO in a momentary way. It wasn’t working. It is a different design than the other switches, so I could not use the same parts to fix it. I ended up unsoldering the switch and disassembling it. The conductive surface on its actuator apparently had worn out. I had some copper foil around, and very carefully cut a small piece of it, and used some Super Glue to attach it to the actuator. I re-assembled the switch, and it worked perfectly.


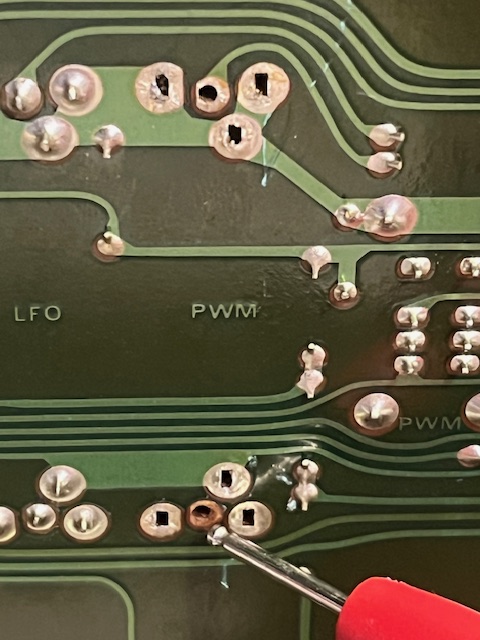
The LFO was only partially functional. (It was working on the Pulse Width Modulation, but it was not modulating the filter or the oscillator.) After a good deal of research, I found someone online who had solved the same issue by replacing a single, burned-out transistor. With the help of a friend who is far better than I am at reading schematics, I located and replaced that transistor. That fixed it.
The switches and sliders are all covered with foam shields to keep dust out. But they deteriorate with age, and tiny pieces of them can get into the sliders and cause issues. Fortunately Syntaur.com sells new ones, so I was able to replace them all. I cleaned all the sliders with Caig Deoxit contact cleaner, and they all ended up working well except for the pulse width modulation slider. I was able to source a replacement from Syntaur, and I soldered it into place.
Cleaning the sliders also solved another issue: When you are using a patch, if you change any parameters of it, you see periods appear after each digit of the patch number. This indicates that you are in edit mode, and not hearing the original patch sound. But mine was going into edit mode occasionally when I had not changed any settings. Cleaning the sliders solved that.
One of the sliders was missing a knob. They are easily found online – either used ones or new ones that all still made for modern Roland synths.
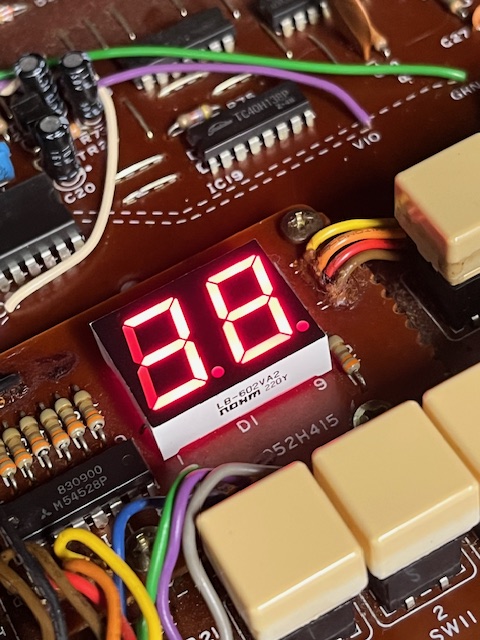
The display that shows the patch number that has been selected had a segment that was intermittently blanking out. I figured I would have to replace it, and was pleased to discover that the part is still manufactured, and could be purchased from many electronic supply houses for about $5. But in tracking that down, I found a data sheet for the display device, and was able to identify the pin number on the display that controlled the intermittent segment. I removed the display board, and found that by wigging that pin, I could make that segment go on or off. I pulled out my soldering iron, re-soldered that pin, and that fixed the issue.
I did a deep cleaning of the boards, the plastic connectors on the boards, the keys and the interior of the cabinet. Then I turned my attention to the cosmetics of the instrument.
The metal lid had some hard, shiny spots where it looked like someone spilled some clear substance, like a wood sealer. I polished those areas repeatedly with a very gentle automotive polish, and was able to remove it without any damage. Then I used a black paint pen to carefully touch up a few pinpoint-sized chips in the lid paint.
The side panels have a wood-grain look, but the finish is actually a laminate surface. I used a wood stain marker to touch up some nicks, and used craft glue to secure some small spots around the edges where the laminate was coming away.

Someone had thoughtlessly painted their initials on the simulated wooden strip below the keys. I was able to easily remove it with a gentle stain and adhesive remover.
Then, I discovered that I was getting random static sounds. The issue turned out to be the back panel output switch that allows you to choose between a low, medium or high output level. By using a bit of DeOxit and rapidly moving the switch between positions, the static vanished.
At this point, it was 100 percent functional and looking – and sounding — great! And I was thrilled that I was able to do all the restoration myself.
To enhance my enjoyment of the Juno-60, I acquired one of these: https://kentonuk.com/product/pro-dcb-mk3/. The Kenton Pro DCB converter plugs into the Juno-60’s DCB port, and adds MIDI capability to the instrument.

With that, I can use the Juno-60 as a master keyboard, and use it to trigger my two other MIDI-equipped keyboards: My JX-3P and my digital Mellotron 4000D. You can imagine the huge, orchestral-like sounds I can get by playing all three instruments together.

In May 2025, I made two improvements: First, I used a couple of drops of the 100% concentration version of Caig Deoxit Fader lube into the open slots on each of the slide pots, and worked them around. They now feel like new. I also replaced the numeric LED display. It was having intermittent failures in one segment. I was grateful to be able to find a new original one from Digikey for less than $5. (It’s an LB-602VA2.) But I noticed recently that Rohm, the manufacturer, is discontinuing the part, and I’m not aware of any other manufacturer of it. If you own a Juno-60, you might find it worthwhile to buy one of these for your spare parts box in case you ever need one.
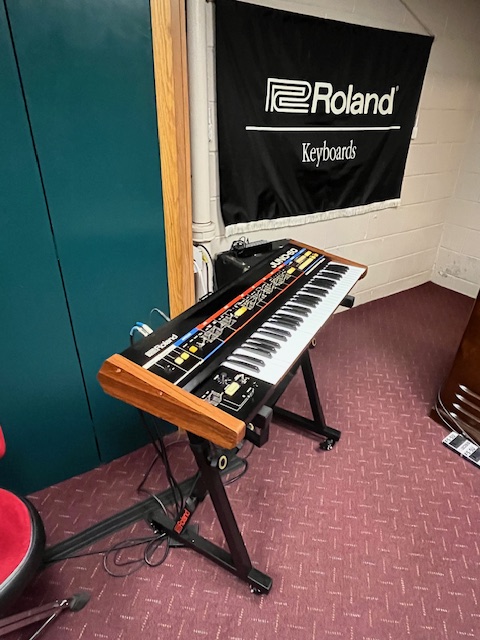
I am running the Juno-60 and the JX-3P through a pair of Peavey KB-100 keyboard amps. The stereo chorus sounds great, and the 15” woofer in each amp really pushes out the deep bass that the Juno-60 can produce. It just sounds fat and dreamy. It’s a beautiful synth, too!
